This part of my blog will detail the editing process done by Regine
Plan and Outline (as a to do list):
Selection & Compilation + Grouping of Footage
Software
Combining Clips with the song = Rough Draft
Feedback (Audience and Teacher)
Execute Revisions
Feedback part 2 (Teacher)
Execute Revisions
Colour grading
Added Effects
Selection & Compilation + Grouping of Footage
Software
Combining Clips with the song = Rough Draft
Feedback (Audience and Teacher)
Execute Revisions
Feedback part 2 (Teacher)
Execute Revisions
Colour grading
Added Effects
Selection & Compilation + Grouping of Footage
Since my group and I had done multiple takes, I had to do the time-consuming job of watching nearly all the footage to find the correct one. This was especially important in the multicam shots where I had to find the single take we took through different angles to ensure the movement remained the same. Although we were warned to use a clapboard to know which footage was which, we found the technique to be difficult in some cases where the writing was not clear to the camera no matter what we tried or that it didn’t work for multicam shots where each of us were in different positions and we did not have an extra hand to hold a diy clapboard. In the end, we decided to leave it out. Instead we would review our footage together, delete failed ones (unless still salvageable) and then upload them to our shared drive. This way, it narrowed down the amount of footage there was for me which reduced the amount of time I spent going through them. Although the process seemed a lot, I truthfully found it easy. Often, I looked for the latest or second latest uploaded footage of a scene as it's likely the best shots and why we choose to stop filming a scene. While the rest of the scenes, I had chosen carefully by process of elimination- evaluating acting, lighting, camera angle/movement to eliminate any footage with noticeable mistakes.
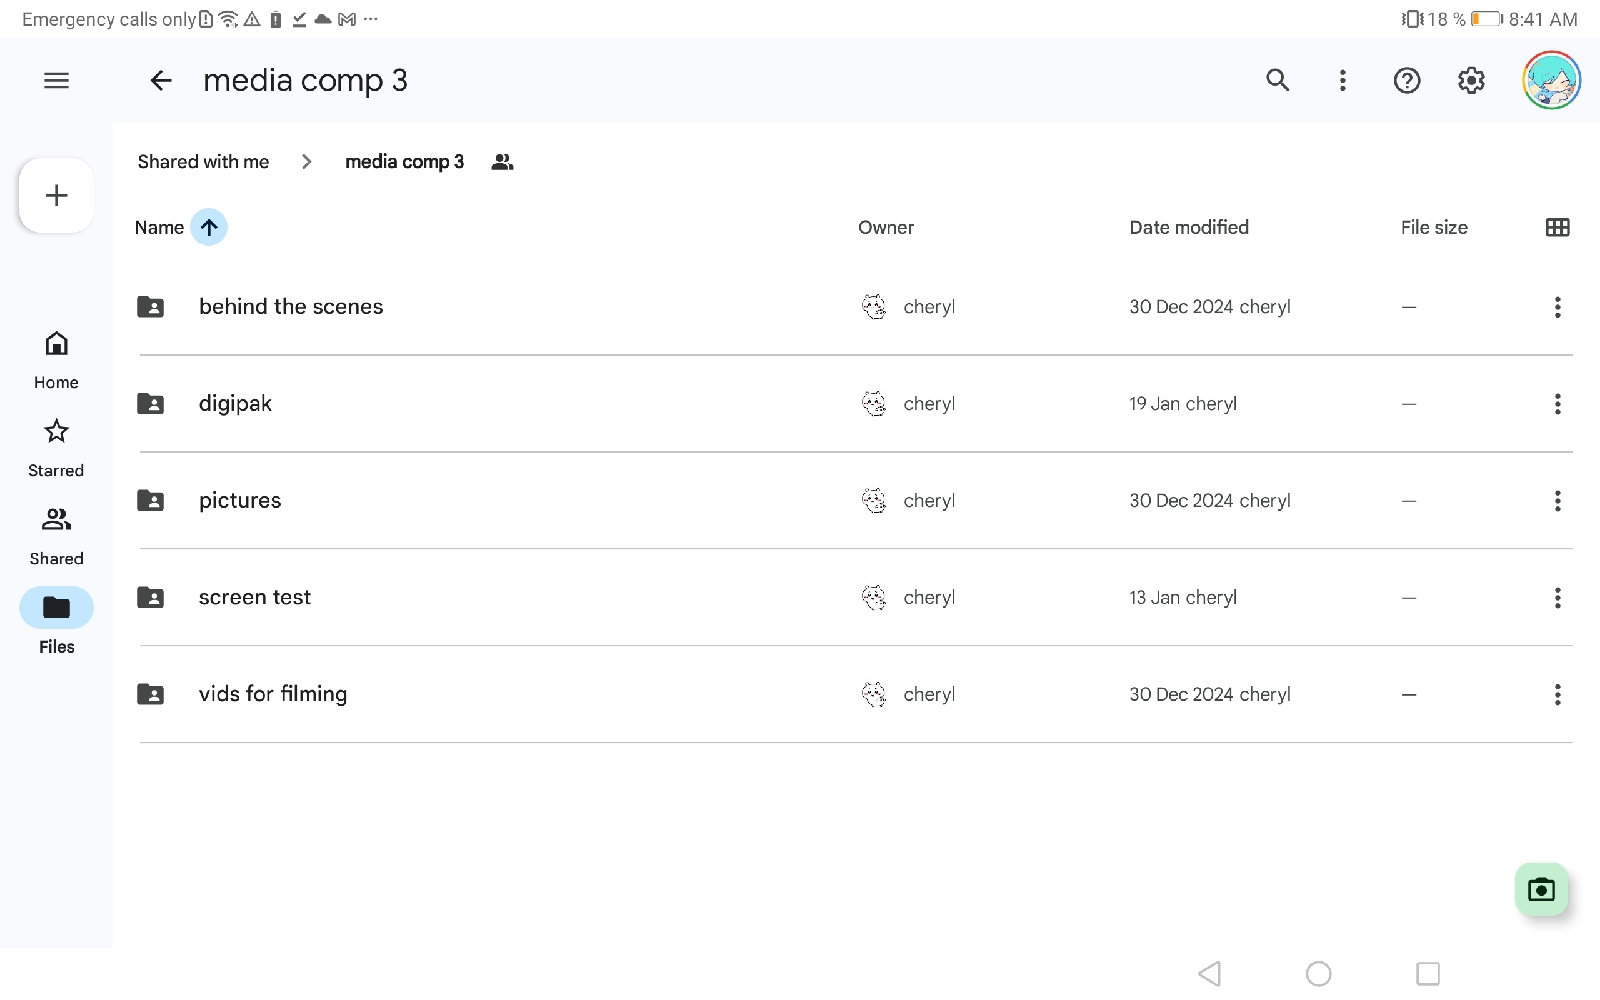
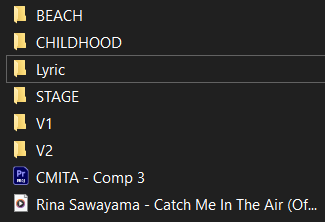
Because of my team’s file organisation on google drive, I was able to compile all the scenes swiftly. I simply had to download it into the correct folder in my laptop. The file organisation on my laptop was similar to the organisation I had with my team where a single folder was dedicated to the entire project and within it, was more folders that included the footage and which scene they belonged to, the music itself, and the project file. This allowed my importing/searching of footage to be easier because the segmentation prevented me from having to comb out each footage if I was looking for one.

Software
To edit the music videos, I chose to use Adobe Premiere Pro 2025, a timeline-based, non-linear video editing software application by Adobe. Although I had no prior knowledge on Adobe Premiere Pro, I had chosen it as my editing software because a friend had recommended it to me for its available features that didn’t require a secondary app like high quality exporting, colour grading, effects, etc . Learn Premiere Pro in 10 minutes - Beginner Tutorial I had used this tutorial to grasp the basics of the software. I have some familiarity with editing apps in general like Adobe After Effects and Capcut so I got comfortable with Premiere quickly and didn’t need much time to adapt. After that, I imported my scenes, added the music, and began to combine all the clips into a rough draft.
Combining Clips with the song & making the Rough Draft
Markers
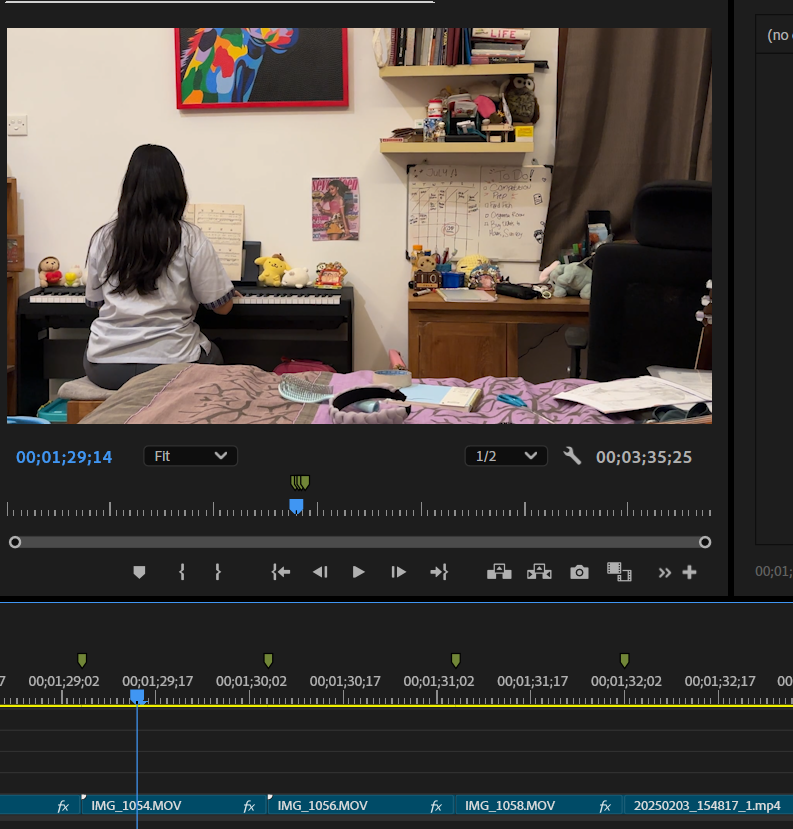
I had used markers to pinpoint where certain beats were. This was important in helping me make sure the clips were cut/followed along with the beat which made the video more rhythmic and satisfying to watch and listen to. Using the markers allowed me to snap my clip duration to the markers rather than guessing where to stop, which made the jumpcut scene much easier to execute.
Jumpcut scene
The jumpcut shot we took was taken without a tripod and by using different takes than one singular take. This was an unintentional mistake by our team since neither of us had a tripod at hand and tried to improvise by just keeping in position and staying as still as possible. However, I still have the job to make sure the composition of each frame is as close as possible. I did this by marking a single stationary point (such as the piano and table) and adjusted my footage based on that point. This process took quite a while since I wanted it to be as seamless as possible, however I think the result was worth the time put into it.
Aspect Ratio Change
A characteristic of old cameras was their 5:4 aspect ratio instead of our now common ratio of 16:9. I wanted to implement this into our childhood footage scene to really sell the realism of old cameras being used in the music video. To do this, I simply took two rectangles (graphics layer) and added them to each vertical ends for the videos within the childhood montage.

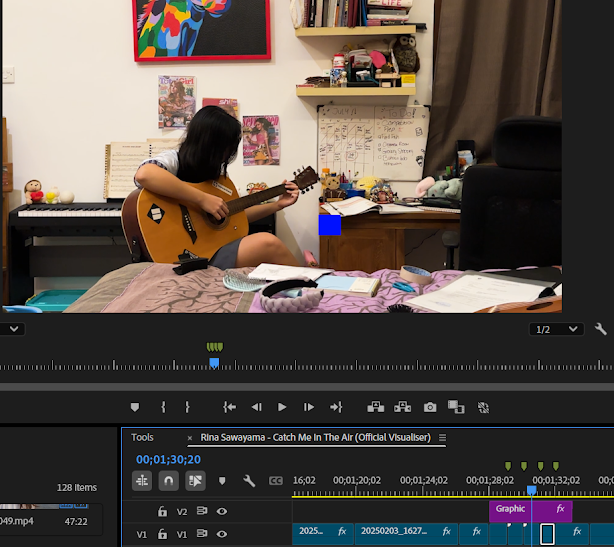
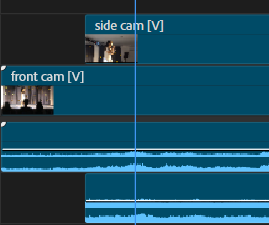
Multicam Syncing
My team and I used the multi-cam technique on 2 occasions; on both stage and beach performances. Since a clapboard was not available for us to use, we used an alternative by clapping in hopes of causing a spike in the audio that's identifiable. Unfortunately when I was in the post-production stage, I saw that the soundwaves of the videos were not loud enough to be able to catch the clap. This was likely due to the distance between each camera was different to the the clapper, on top of the fact that the room was extremely echoey. This was also the case for the beach performance as the atmospheric sounds (like wind, people, the ocean, etc) drowned out the noise of the clap.
Since there was no other way to combat this issue because we already finished filming, I decided to power through it and synced it manually. Although it took much more time than using a clapboard, it wasn’t too difficult to watch for visual indicators which was often body movement as well as listening closely to the song playing in the background of the videos and sync it with the actual soundtrack. There were generally no issues to me during this process other than a minor instance of not being able to make out the words being sung, which confused me on whether or not it was synced to the music.
Feedback (Audience and Teacher)
I made the first ever draft to send to my teacher to get his feedback. You can watch the draft through this link.
https://drive.google.com/file/d/13zxYsOspH_jBtg38i4zicwVlhZIFl3-V/view
During the time we were supposed to have a feedback session, I fell ill so I didn't receive the feedback directly but instead, my teammates collected the feedback. Here are the problems my teacher found:
The first clip (0:00-0:11) does not connect with the following scenes, since it does not show her going to her house. It's better to remove it completely or replace it with another scene. Our teacher suggested a scene of the flowers floating in the water might be a good fit as it would connect the start of the music video to the end.
There are some errors (00:52) with the ratios of the childhood videos
Decide on whether to leave or include the original sound of the childhood videos since there was only one video that included its original audio.
The colour and quality of the camera changes between two scenes (from 01:31 to 01.33). My teacher suggested to colour grade them so they have the same colour and tones
There seemed to be a mistake in the audio and video syncing in one of the stage performances
The transition from the hand that was lifted in the stage to the beach needs a few changes:
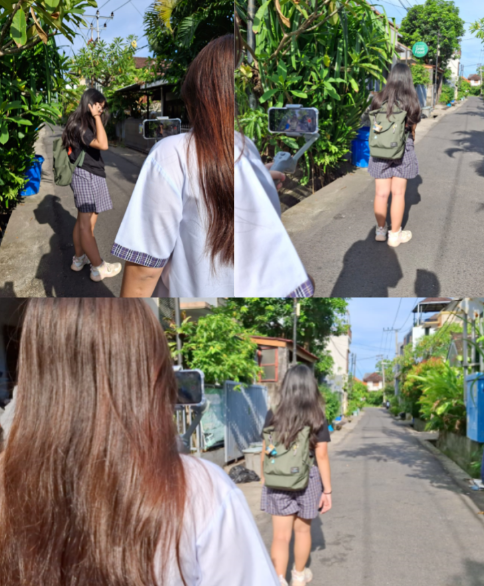
My teacher suggested rather than transitioning a tilt camera movement to a static shot of the beach, shoot a scene with similar camera movement
My teacher specifically suggested tilting downwards to the sand and then tilting upwards to show a long shot of vina walking on the beach. He provided my friends with a drawing to explain this.
He also suggested we shoot her from different POVs like from the back, the side, and the front.
My teammates have been discussing the use of voice note conversations to add as background noise to the music video. Cheryl had made phrases and sentences and borrowed the voice of her moms’ friend. After receiving the voiceovers, I edited them into the music video.
The first clip (0:00-0:11) does not connect with the following scenes, since it does not show her going to her house. It's better to remove it completely or replace it with another scene. Our teacher suggested a scene of the flowers floating in the water might be a good fit as it would connect the start of the music video to the end.
There are some errors (00:52) with the ratios of the childhood videos
Decide on whether to leave or include the original sound of the childhood videos since there was only one video that included its original audio.
The colour and quality of the camera changes between two scenes (from 01:31 to 01.33). My teacher suggested to colour grade them so they have the same colour and tones
There seemed to be a mistake in the audio and video syncing in one of the stage performances
The transition from the hand that was lifted in the stage to the beach needs a few changes:
My teacher suggested rather than transitioning a tilt camera movement to a static shot of the beach, shoot a scene with similar camera movement
My teacher specifically suggested tilting downwards to the sand and then tilting upwards to show a long shot of vina walking on the beach. He provided my friends with a drawing to explain this.
He also suggested we shoot her from different POVs like from the back, the side, and the front.
My teammates have been discussing the use of voice note conversations to add as background noise to the music video. Cheryl had made phrases and sentences and borrowed the voice of her moms’ friend. After receiving the voiceovers, I edited them into the music video.
Execute Revisions
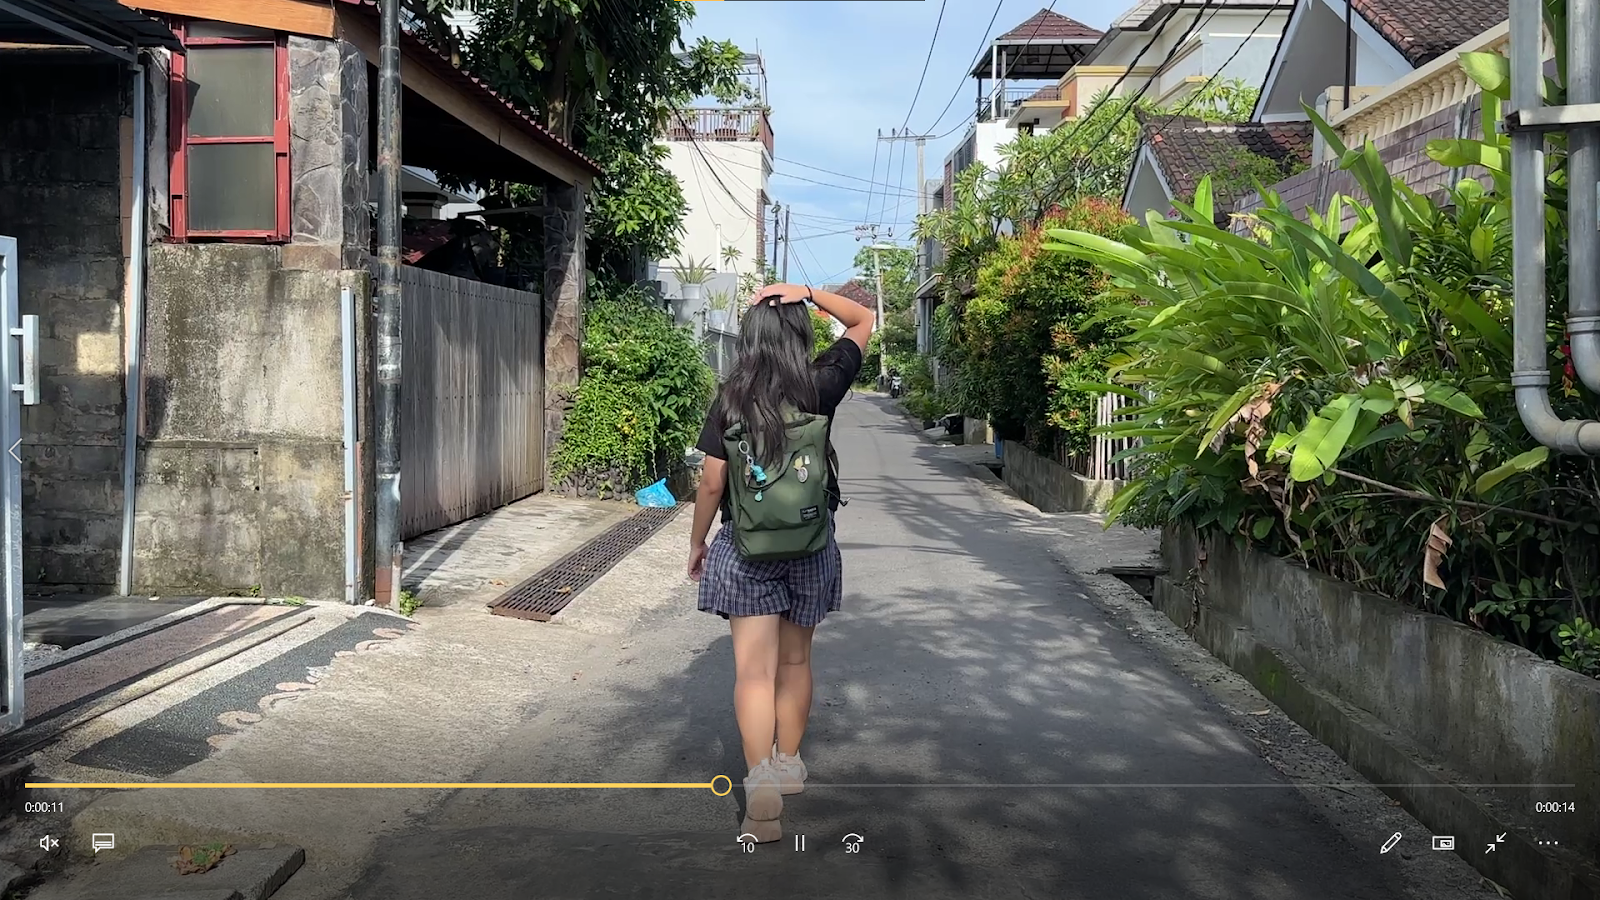
I approached my team to think about a solution to the introduction being unfit. We originally discussed a scene of our artist taking the bus however since the public buses in Bali stopped running on January 1st of 2025, we discussed alternatives such as walking home. We decided to take time to shoot this scene afterschool. However I did not end up liking the walking home scene because it felt too plain and didn’t bring more to the story we were trying to tell so I tried my teacher’s other suggestion on the floating flowers.
I think the flowers worked well in connecting the whole music video together by foreshadowing the end at the beginning. It also acts as a hermeneutic code as viewers might be curious as to why there were flowers and what they symbolise, drawing the viewers to continue watching.
The errors were fixed and I had added and changed the arrangement of the video to look more chronological and show the artist growing up. This also meant rearranging and mixing the order of the real childhood footage to the recreated one that we filmed, so it would blend in smoothly together.
Our teacher and my teammates said it would be better to leave out the audio of the childhood footage so the focus would be on the videos. On top of that, a lot of the footage was of playing piano so the music playing would clash with the soundtrack. With those comments, I decided to leave the audio out.
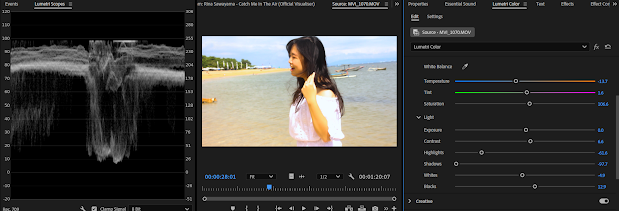
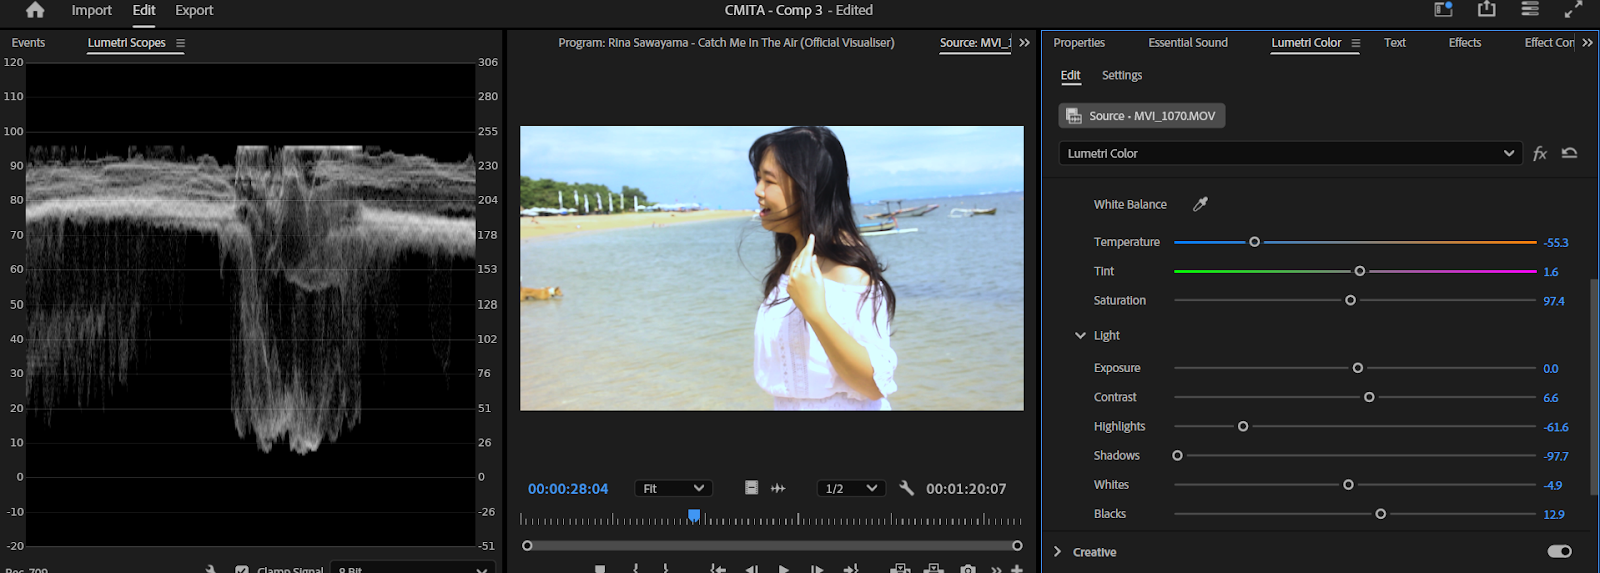
I attempted to match the colours and quality between the videos but ultimately found it too difficult since the beach performance that Aurel had filmed with her camera was extremely overexposed. I used How to Fix OVEREXPOSED Video in Premiere Pro! By THAT ICELANDIC GUY
Although I was able to bring down the exposure, there was a second problem with the oversaturated yellow that did not match the other scenes. I tried to cancel out the yellows by playing with the temperature and colour wheels to add more blue that would cancel out the yellow. However, I could not strike a balance between the colours and the actress would just end up too blue or too yellow. So I made the choice to leave out the videos she recorded and replaced it with a b-roll footage.
I rewatched the performance scene and made sure to pay attention so that the singing and music is synced.
The static shot of the beach was changed and followed with a matching movement that would transition the artist from the stage to the beach.
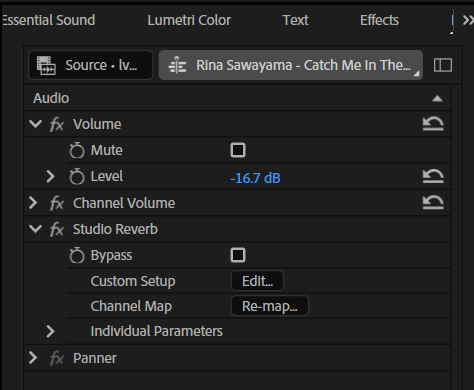
I thought the use of 3 voiceovers was excessive so I suggested to my team to keep one. We took a quick vote and ended up keeping the last voiceover but lowered the volume. During this, I had also added reverb to the audio to make it more echoey.
I approached my team to think about a solution to the introduction being unfit. We originally discussed a scene of our artist taking the bus however since the public buses in Bali stopped running on January 1st of 2025, we discussed alternatives such as walking home. We decided to take time to shoot this scene afterschool. However I did not end up liking the walking home scene because it felt too plain and didn’t bring more to the story we were trying to tell so I tried my teacher’s other suggestion on the floating flowers.
The errors were fixed and I had added and changed the arrangement of the video to look more chronological and show the artist growing up. This also meant rearranging and mixing the order of the real childhood footage to the recreated one that we filmed, so it would blend in smoothly together.
Our teacher and my teammates said it would be better to leave out the audio of the childhood footage so the focus would be on the videos. On top of that, a lot of the footage was of playing piano so the music playing would clash with the soundtrack. With those comments, I decided to leave the audio out.
I attempted to match the colours and quality between the videos but ultimately found it too difficult since the beach performance that Aurel had filmed with her camera was extremely overexposed. I used How to Fix OVEREXPOSED Video in Premiere Pro! By THAT ICELANDIC GUY
I rewatched the performance scene and made sure to pay attention so that the singing and music is synced.
The static shot of the beach was changed and followed with a matching movement that would transition the artist from the stage to the beach.
I thought the use of 3 voiceovers was excessive so I suggested to my team to keep one. We took a quick vote and ended up keeping the last voiceover but lowered the volume. During this, I had also added reverb to the audio to make it more echoey.
Feedback part 2 (Teacher)
After a few changes, I went back to ask my teacher for more feedback. Here are all the suggestions he mentioned:
My teacher mentioned beginning with a black screen and adding a fade in to the beginning shot
The light switch scene should have the lights turn on when the soundtrack says “Hey [..]” as it is a crucial moment where the song begins (or where the lyrics start) while the lightswitch was a moment where the story begins.
Minor fixes to the duration of clips to ensure they cut to the beat for the beginning scenes with all the childhood photos
Changes need to be made on the phone screen scene because it is currently unreadable, which would make the scene pointless as the audience won't be able to catch on to the information in that scene and thus miss a big part of the story. My teacher suggested a single message rather than a conversation that pops up as a notification. He also added that we could have the background of the phone that receives the notification to be a wallpaper of the artist and her mom.
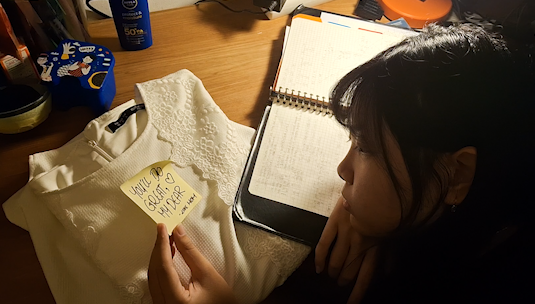
My teacher suggested changing the order of the note scene where it begins with the artist looking at a note and then going in to reveal what the note says rather than vice versa.
Ensuring continuity at the end where the artist walking into the water must end with her stopping as the following scene was of the artist standing still. This also applies to the floating flower scene at the end. My teacher suggested letting the flowers float more after being released from the hand before moving to the next scene.
The voiceover at the end was unclear, it was suggested to either remove it, record a clearer one or add subtitles at the bottom. As we were nearing our deadline, I choose to add a subtitle which had the extra benefit of being able to translate the Indonesian words as well
My teacher mentioned beginning with a black screen and adding a fade in to the beginning shot
The light switch scene should have the lights turn on when the soundtrack says “Hey [..]” as it is a crucial moment where the song begins (or where the lyrics start) while the lightswitch was a moment where the story begins.
Minor fixes to the duration of clips to ensure they cut to the beat for the beginning scenes with all the childhood photos
Changes need to be made on the phone screen scene because it is currently unreadable, which would make the scene pointless as the audience won't be able to catch on to the information in that scene and thus miss a big part of the story. My teacher suggested a single message rather than a conversation that pops up as a notification. He also added that we could have the background of the phone that receives the notification to be a wallpaper of the artist and her mom.
My teacher suggested changing the order of the note scene where it begins with the artist looking at a note and then going in to reveal what the note says rather than vice versa.
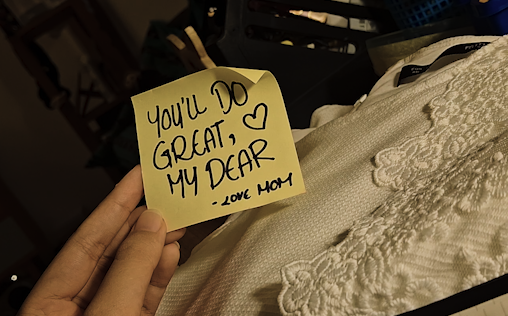
Ensuring continuity at the end where the artist walking into the water must end with her stopping as the following scene was of the artist standing still. This also applies to the floating flower scene at the end. My teacher suggested letting the flowers float more after being released from the hand before moving to the next scene.
The voiceover at the end was unclear, it was suggested to either remove it, record a clearer one or add subtitles at the bottom. As we were nearing our deadline, I choose to add a subtitle which had the extra benefit of being able to translate the Indonesian words as well
Execute Revisions
A fade in and out was easily added with the help of a feature called “Apply Default Transition.” When hovering over the start/end of a sequence/shot, right-clicking would access this tab. Then I simply adjusted the duration of the cross dissolve transition to my liking.
Fixes regarding the timing, duration to match the beat of the music or sequence of a shot/scene was done quick and easily without little to no hassle.
The phone screen scene was roughly 4 seconds long so I didn’t require my whole team to be involved for this. I reshot the scene at home using my phone as the receiver and my mom’s phone as the camera. I had asked Cheryl to temporarily remove her profile picture as well as renaming her contact to Mama with a heart. I prepared a message for her to send and gave her instructions to send it within the next 5 seconds so I could have time to prepare the camera. There was a comment by my teacher to change the message from Indonesian to English which I also did. This process was short and took roughly less than 10 minutes to do.
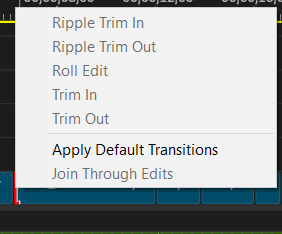
Colour grading
Before diving into colour grading, I did believe it was important for me to understand colour theory so I watched a simple and short video to explain it.
https://www.youtube.com/watch?v=AvgCkHrcj90&pp=ygUTYmFzaWMgY29sb3VyIHRoZW9yeQ%3D%3D to give me the foundational knowledge. I then went to watch a more specific video on how to colour grade on my software. I used this video. https://www.youtube.com/watch?v=ItcZ3Ps7FBw&pp=ygUkYmFzaWMgY29sb3VyIGdyYWRpbmcgaW4gcHJlbWllcmUgcHJv
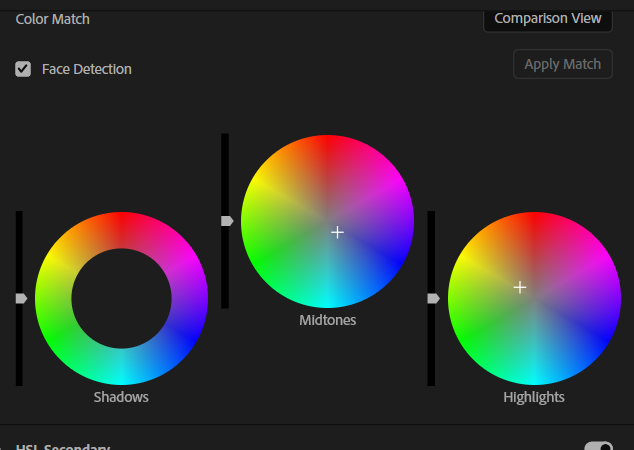
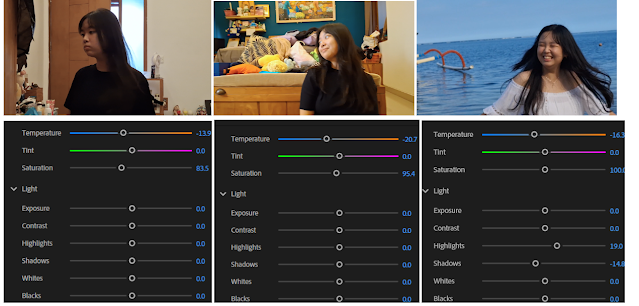
When colour grading, I wanted to really consider how the colour of the current scene is going to affect the audience's emotions. So I opted to a more desaturated, grey look at the beginning of the story to emphasize the boringness and blandness of this stage of the artist's life. After discovering the box’s content and reigniting her passion to start up music again, I would increase the warmth and saturation of the scenes to build a sense of rediscovery of self and interests in a hopeful and inspiring manner. By the end, I intended for audiences to truly feel the energetic and lively atmosphere that's almost reminiscent of the feeling of freedom so I choose to push the blues in the end scenes and increase the saturation to bring out the vibrancy of the blues.
Added Effects
Getting that vintage, retro effect for the recreation of childhood videos was extremely important to be right inorder to be believable when mixed with actual childhood videos. When I had looked up examples of old digital camera examples on Pinterest, I found the common traits of these pictures were bloom and noise.
Bloom refers to an effect when light extends past the borders of bright area in an image which causes a bright light dispersion that gives the photograph a dreamy look and nostalgic feeling. While noise is said to be the undesired fluctuations of color or luminance that often disrupts and hides the detail of an image.
To copy this look on my footages, I looked into 2 tutorials which were fairly easy to replicate and gave me the results I was looking for.
https://www.youtube.com/watch?v=EMljjxrPFNw > by adding grain, my footages looked more authentic as if it was really taken from the past
https://www.youtube.com/watch?v=AVZjcovmAcg&t=3s > by using a feature that blurs a certain colour channel, I could make my childhood videos seem glowy
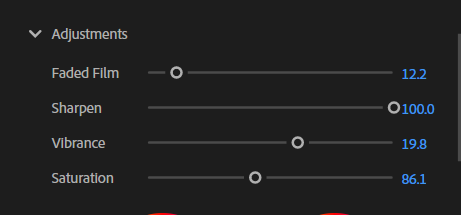
Other edits I made were to increase the sharpness of the scenes (commonly found in VHS tapes which I considered following but crossed it out when I figured camcorders were too old for the artist’s generation), added a faded film effect that lightened the footage to look older/worn out and a touch of vibrancy.
- Although I was not able to help much, when I did, I helped by reminding Regine details she may have missed (such as including the voice note of the star's mother talking and by giving her the feedback she needs (such as which clip may suit better in certain parts.